
查看官方最新源
https://dev.mysql.com/downloads/repo/yum/
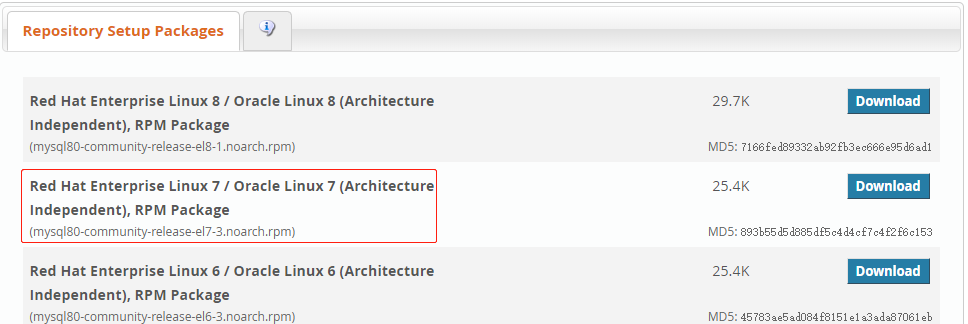
选择合适自己平台的源进行下载,博主选的是Centos7的源
# wget https://dev.mysql.com/get/mysql80-community-release-el7-3.noarch.rpm
本地安装mysql源
# yum localinstall mysql80-community-release-el7-3.noarch.rpm
检查是否安装成功
# yum repolist enabled | grep "mysql.-community." //或者下面这条命令
# yum repolist all | grep mysql
修改安装版本(非必须)例如要安装5.7版本,将5.7源的enabled=0改成enabled=1,将8.0的enabled=1改成enabled=0即可,如下(本次未做修改,直接安装最新版8.0.17)
源仓库路径:/etc/yum.repos.d/mysql-community.repo
(如果有)删除以前安装的MySQL或MariaDB
# yum remove MariaDB-server MariaDB-client MariaDB-common
# yum mysql-community-server mysql-community-client mysql-community-common mysql-community-libs

//删除mysql的配置文件,卸载不会自动删除配置文件,首先使用如下命令查找出所用的配置文件
# find / -name mysql
//可能的显示结果如下:
/usr/bin/mysql
/usr/lib64/mysql

# rm -rf  /usr/bin/mysql
# rm -rf  /usr/lib64/mysql
请确认所有旧数据的文件配置文件等已删除,否则新安装可能会失败!
安装
# yum install mysql-community-server mysql-community-client mysql-community-common mysql-community-libs
查看临时密码
# grep 'temporary password' /var/log/mysqld.log
//Iw?rXfa3%mt_
为root账户设置密码
# mysql_secure_installation
本篇演示一下用命令mysql_secure_installation来安全初始化我们的MySql服务器。

mysql_secure_installation
Securing the MySQL server deployment.
Enter password for user root:
The existing password for the user account root has expired. Please set a new password.
New password:    <<<<<
Re-enter new password:    <<<<
Estimated strength of the password: 100
Do you wish to continue with the password provided?(Press y|Y for Yes, any other key for No) : n
By default, a MySQL installation has an anonymous user,
allowing anyone to log into MySQL without having to have
a user account created for them. This is intended only for
testing, and to make the installation go a bit smoother.
You should remove them before moving into a production
environment.

Remove anonymous users? (Press y|Y for Yes, any other key for No) : Y  <---是否删除匿名用户,删除,输入Y回车
Success.


Normally, root should only be allowed to connect from
'localhost'. This ensures that someone cannot guess at
the root password from the network.

Disallow root login remotely? (Press y|Y for Yes, any other key for No) : N  <---是否删禁止root用户远程登录,输入N回车

 ... skipping.
By default, MySQL comes with a database named 'test' that
anyone can access. This is also intended only for testing,
and should be removed before moving into a production
environment.


Remove test database and access to it? (Press y|Y for Yes, any other key for No) : Y <---是否删除测试数据库test,删除,输入Y回车
 - Dropping test database...
Success.

 - Removing privileges on test database...
Success.

Reloading the privilege tables will ensure that all changes
made so far will take effect immediately.

Reload privilege tables now? (Press y|Y for Yes, any other key for No) : Y  <---刷新权限,输入Y回车
Success.

All done!
登录
# mysql -uroot -p
在8之前的版本中,对于全局变量的修改,其只会影响其内存值,而不会持久化到配置文件中。数据库重启,又会恢复成修改前的值。从8开始,可通过SET PERSIST命令将全局变量的修改持久化到配置文件中。
//查看级别表
mysql> SHOW VARIABLES LIKE 'validate_password%';
 +--------------------------------------+--------+
 | Variable_name                        | Value  |
 +--------------------------------------+--------+
 | validate_password.check_user_name    |  ON    |
 | validate_password.dictionary_file    |        |
 | validate_password.length             |   8    |
 | validate_password.mixed_case_count   |   1    |
 | validate_password.number_count       |   1    |
 | validate_password.policy             | MEDIUM | <<<<
 | validate_password.special_char_count |   1    |
 +--------------------------------------+--------+
//修改密码级别:
mysql> set persist validate_password.policy=LOW;
mysql> set persist validate_password.length=6;
mysql> SHOW VARIABLES LIKE 'validate_password%';
 +--------------------------------------+--------+
 | Variable_name                        | Value  |
 +--------------------------------------+--------+
 | validate_password.check_user_name    |  ON    |
 | validate_password.dictionary_file    |        |
 | validate_password.length             |   8    |
 | validate_password.mixed_case_count   |   1    |
 | validate_password.number_count       |   1    |
 | validate_password.policy             |  LOW   |  <<<
 | validate_password.special_char_count |   1    |
 +--------------------------------------+--------+
修改密码
mysql> ALTER USER 'root'@'*' IDENTIFIED BY 'xxx';   <<<
//如是不行改用下面的方法
mysql> ALTER USER 'root'@'localhost' IDENTIFIED BY 'xxx';
允许远程登录
mysql> select host, user, authentication_string, plugin from mysql.user;
 +-----------+------------------+------------------------------------------------------------------------+-----------------------+
 | host      | user             | authentication_string                                                  | plugin                |
 +-----------+------------------+------------------------------------------------------------------------+-----------------------+
 | %         | root             | xxxxxxxxxxxxxxxxxxxxxxxxxxxxxxxxxxxxxxxxxxxxxxxxxxxxxxxxxxxxxxxxxx     | caching_sha2_password |
 | %         | test             | xxxxxxxxxxxxxxxxxxxxxxxxxxxxxxxxxxxxxxxxxxxxxxxxxxxxxxxxxxxxxxxxxx     |
 | localhost | mysql.infoschema | $xxxxxxxxxxISACOMBINATIONOFINVALIDSALTANDPASSWORDTHATMUSTNEVERBRBEUSED | caching_sha2_password |
 | localhost | mysql.session    | $xxxxxxxxxxISACOMBINATIONOFINVALIDSALTANDPASSWORDTHATMUSTNEVERBRBEUSED | caching_sha2_password |
 | localhost | mysql.sys        | $xxxxxxxxxxISACOMBINATIONOFINVALIDSALTANDPASSWORDTHATMUSTNEVERBRBEUSED | caching_sha2_password |
 +-----------+------------------+------------------------------------------------------------------------+-----------------------+
mysql> update mysql.user set host='%' where user='root';
mysql> FLUSH PRIVILEGES;
创建用户
//如果不行用下面的方法
mysql> create user 'root'@'localhost' identified by 'xxx';
//创建用户
mysql> create user 'root'@'%' IDENTIFIED BY 'xxx';
mysql> GRANT ALL PRIVILEGES ON . TO 'root'@'%' WITH GRANT OPTION;  //赋予所有权限
//update user set host='localhost' where user='test';
//update user set user='root' where user='test';
//ALTER USER "root"@"localhost" IDENTIFIED  BY "xxx";  //修改密码
mysql> FLUSH PRIVILEGES;
自然认证方式
mysql8.0起默认使用caching_sha2_password认证方式,目前比较旧版的php(php7.3以下)都不支持新认证方式,可以改为mysql_native_password认证方式,
mysql> create user 'test_xxx'@'%' IDENTIFIED  WITH mysql_native_password BY 'xxxx';
mysql> ALTER USER 'test_xxx'@'%' IDENTIFIED WITH mysql_native_password BY 'xxxx';
mysql> ALTER USER 'blog'@'localhost' IDENTIFIED WITH mysql_native_password BY 'xxxx';
出现@Can’t connect to local MySQL server through socket 问题解决
ERROR 2002 (HY000): Can't connect to local MySQL server  重启服务器
查看 /var/lib/mysql/ 下是否有 mysql.sock 文件!
如果没有 执行以下命令: #chown -R mysql:mysql /var/lib/mysql
服务器重启: #service mariadb restart
确保 /etc/my.cnf 下 的socket = /tmp/mysql.sock 位置配置正确
数据备份/导入/导出
//数据备份,导出指定的库 -f后面为指定库 > 后面为需要保存的位置
# mysqldump -uroot -p'xxx'  -f xxx_db > /root/xxx.sql
# mysqldump -uroot -p'xxx'  -f xxx_db > /root/xxx.sql
//可将命令写入crontab中以达到自动备份的效果
//导入数据,导入到指定的库
# mysql -uroot -p  -f xxx_db < /root/2019-08_xxx.sql


方法二:
(1)选择数据库
mysql>use abc;
(2)设置数据库编码
mysql>set names utf8;
(3)导入数据(注意sql文件的路径)
mysql>source D:/phpstudy_pro/WWW/ns.time50.com/xxx.sql;  #注意"\" 要改为"/"

如果出现失败,在my.ini加入一行 , 并重启服务器
[client]
default-character-set=utf8
服务器相关的命令
# service mysqld restart
# service mysqld status
# systemctl enable mysqld.service
